

White Chocolate Flower, Pink Grapefruit & Lemon Cake
Mothers day and its another cake!
If anyone knows me, they’ll probably know that celebrations of this kind, birthdays, valentines, anniversaries and mothers day are not that popular in my home. This is mainly because i’m a grumpy and depressed woman. Not a a lot of people know that :) Along with the fact i don’t really think i deserve to be celebrated and feel that if friends or family are spending time with me they are doing it because they feel obliged to or they need something.
Just because i’m reluctant to feel the mothers day vibe, doesn’t mean that i don’t like to prepare nice things for others, so this White Chocolate Flower, Pink Grapefruit & Lemon Cake is a perfect cake bake for those mothers out there who do like to celebrate.
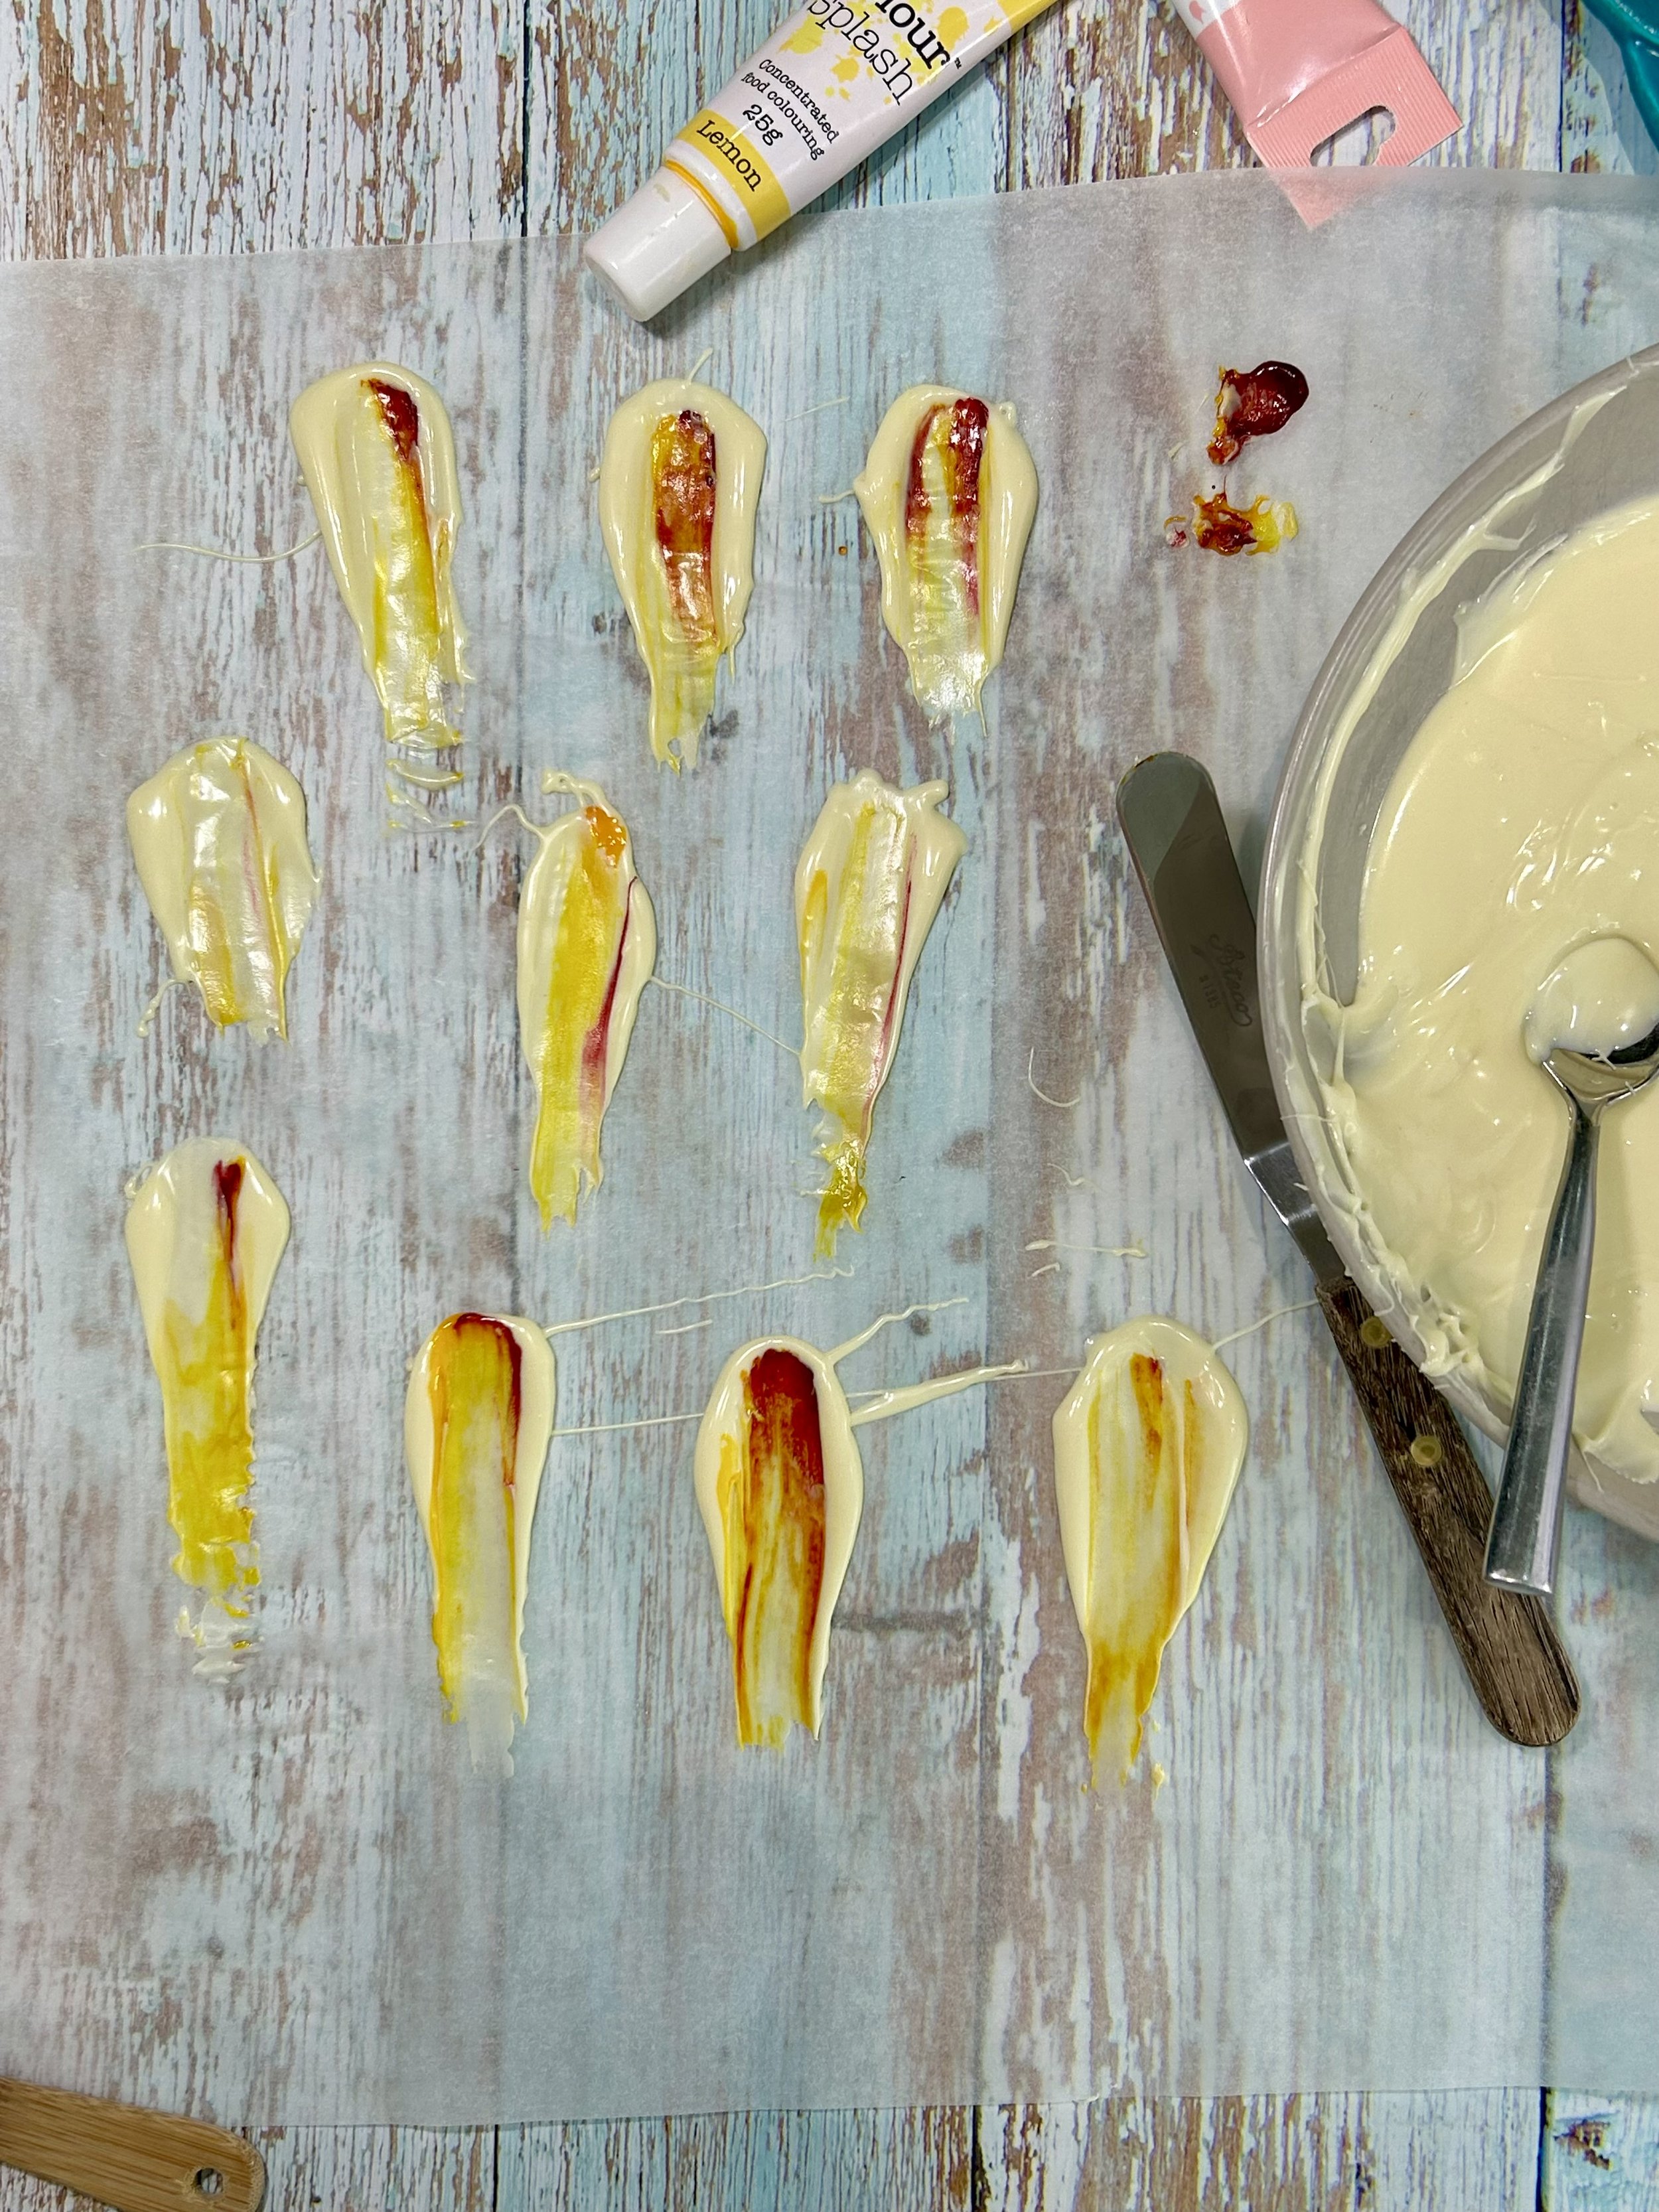
For the chocolate petals, i’ve used two gel food colours to make a bit of an impact, but if you’ve not got any gel colouring try using two different chocolates.
A petal half white chocolate and half milk chocolate will look really impactful too.
Liquid food colouring is not good to use, the water content isn’t good for chocolate, save it for use in the cake itself.
Go on, give it a go and enjoy your sweet life!

Pretty Layered chocolate white petals make this cake special
What You Need
Cake
540g Self-Rising Flour – Extra for dusting
480g Castor Sugar
400ml mix of Pink Grapefruit Juice & Lemon Juice
360g Butter – softened to room temperature – Extra for greasing tins
6 Large Eggs
2 tsp Vanilla Extract
Zest from 2 Large Pink Grapefruit
Zest from 6 Lemons
2 tsp Baking Powder

Lots of pink grapefruit and lemon zest makes this super fresh
Icing
450g Icing Sugar - Sieved
250g Butter – Softened to Room Temperature
Zest from 2 Lemons
1 tsp Vanilla Extract
1-4 tbsp Mix of Pink Grapefruit juice and Lemon Juice – See Tip Box

Note to self, be more careful when mixing the icing
Flower Petals
300g White Chocolate Chips – See Tip Box
1 ½ tsp Coconut Oil
Gel Food Colouring - Pale Pink and Daffodil Yellow
Non-Stick Baking parchment
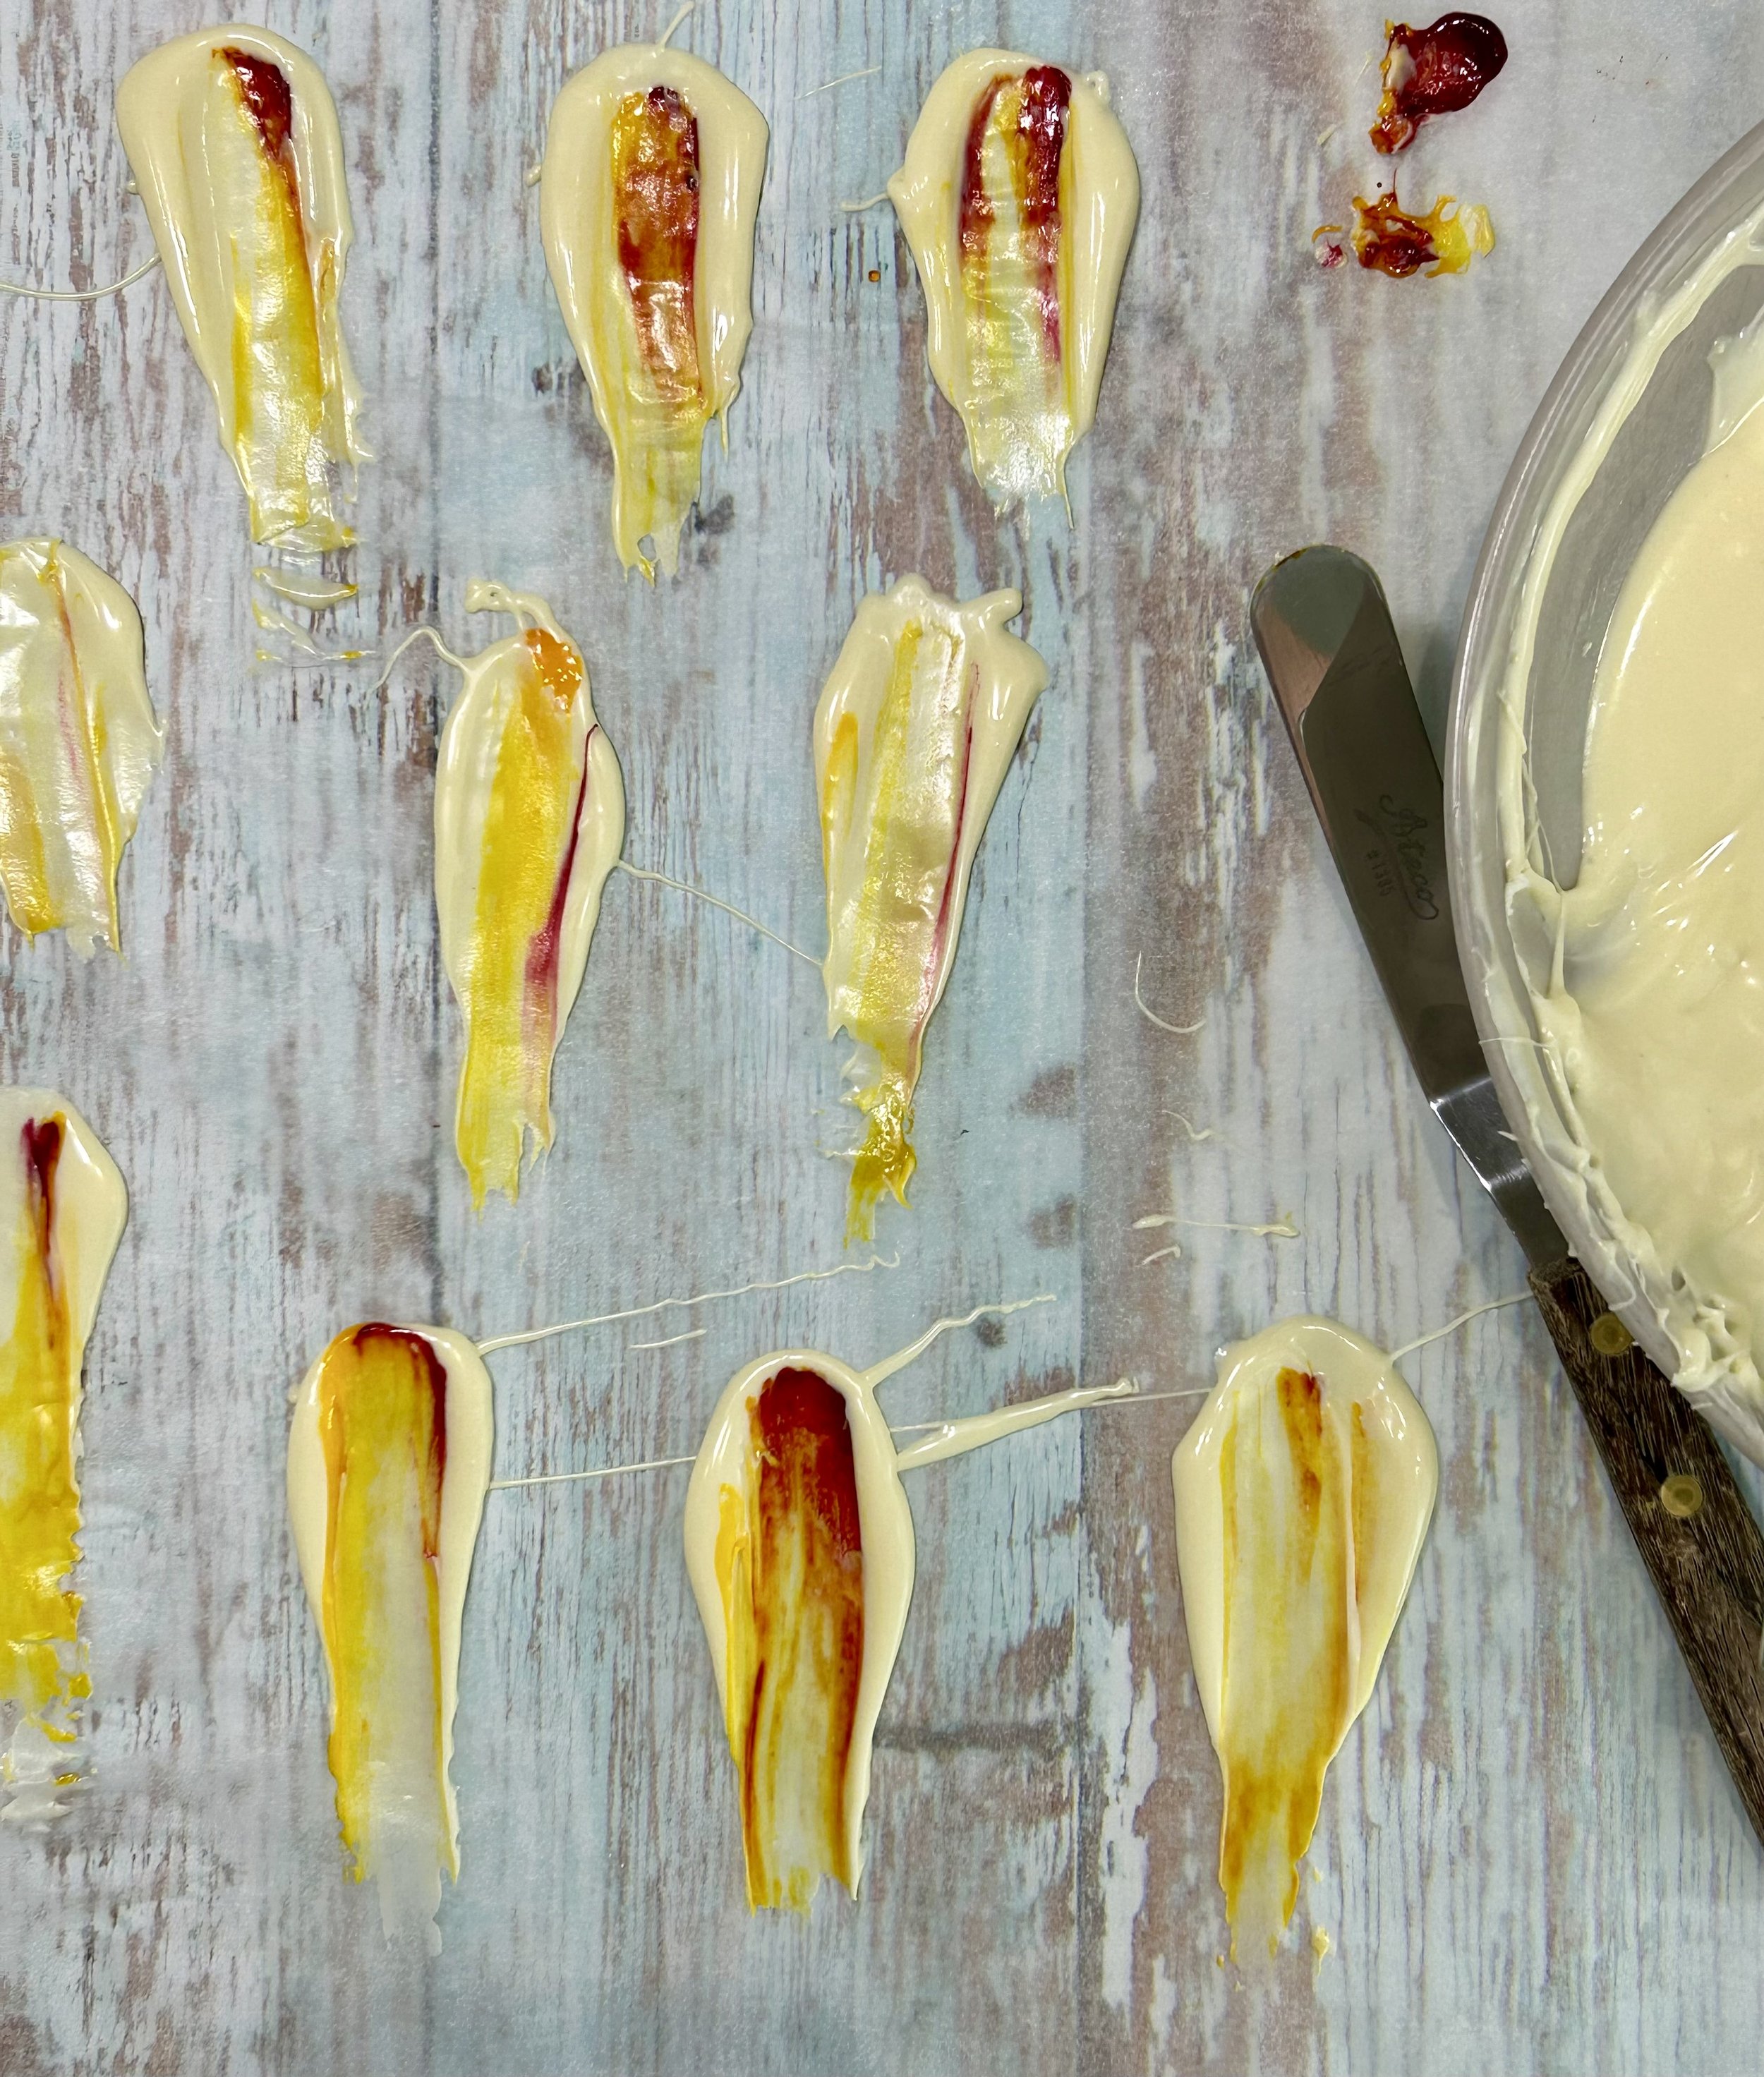
Melted white chocolate striped with a couple of different coloured food gel colouring
Also Needed
4 x 8” Shallow baking tins – See Tip Box
Non-Stick Baking Parchment
Electric Mixer
Small Palette Knife
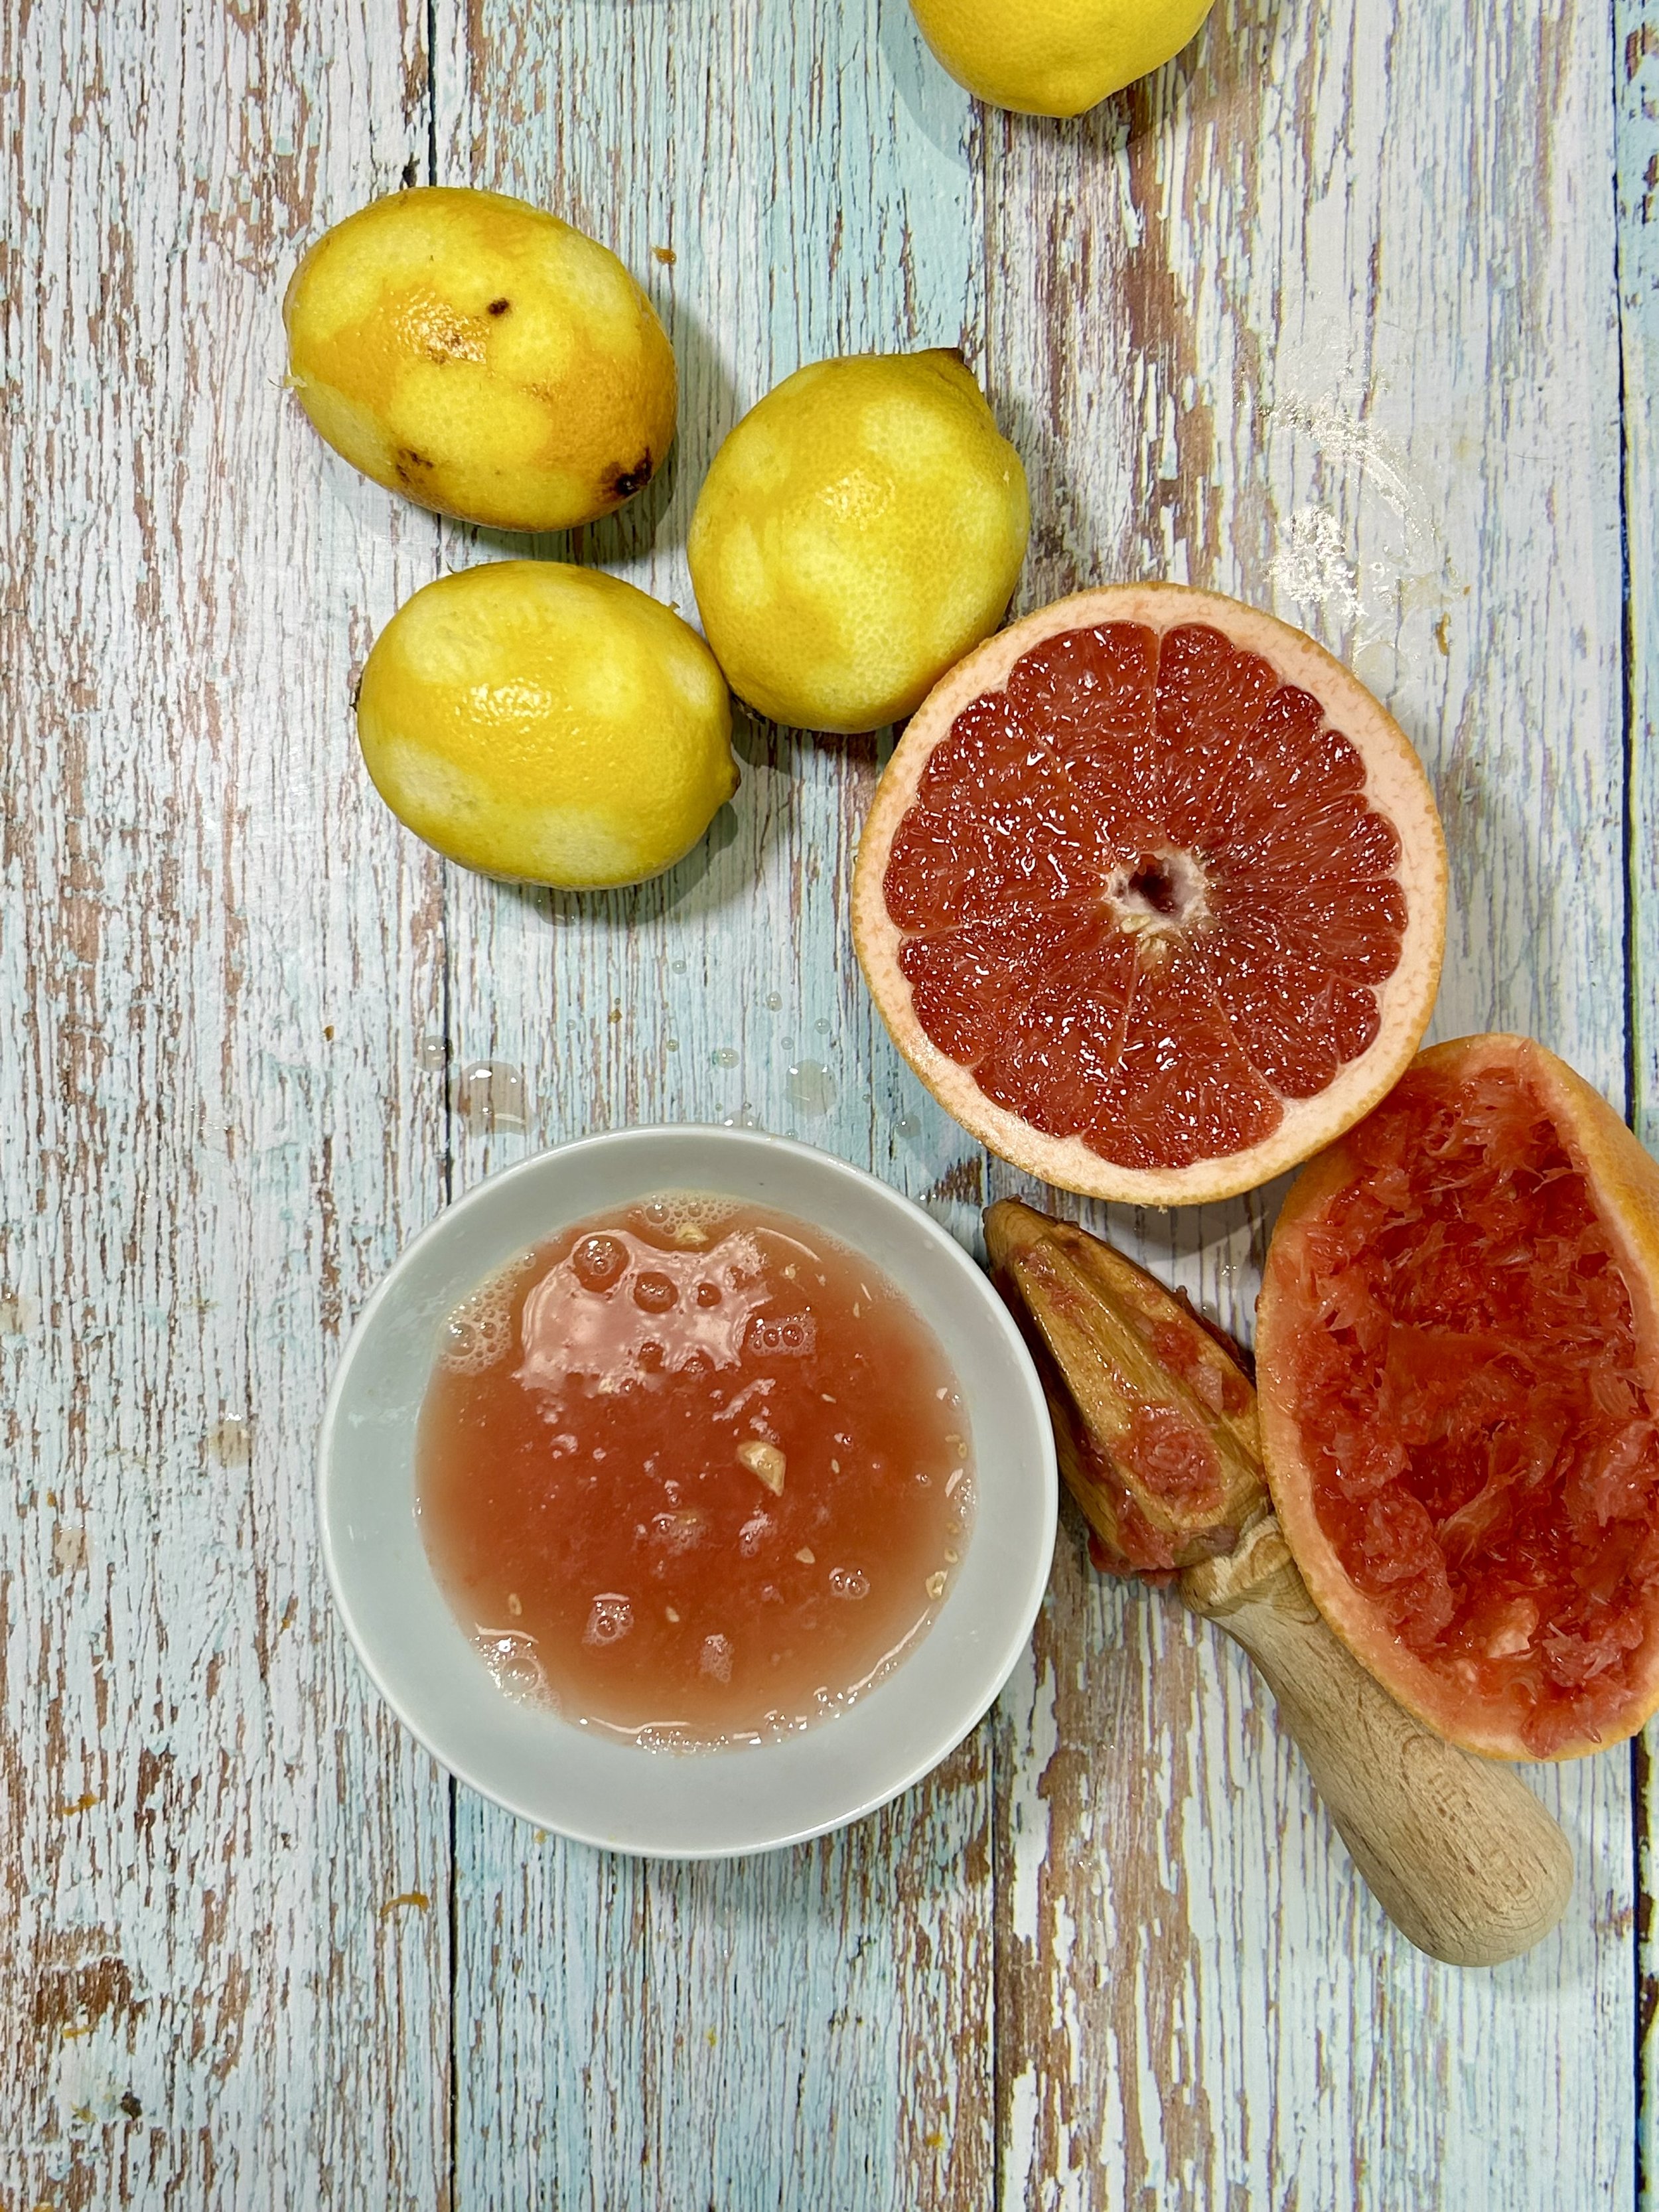
All that citrus juice makes the cake super moist
How It’s Done
Cake
Heat the oven to 180c
Prepare the 4 x 8” cake tins – See Tip Box
Prepare the cake tins by rubbing the inside of all of the tins with butter, make sure to coat all of the crevices
Dust the inside of all of the tins with flour and shake out all of the excess. Make sure that all of the inside is dusted with the flour.
Set the prepared tins aside until needed.
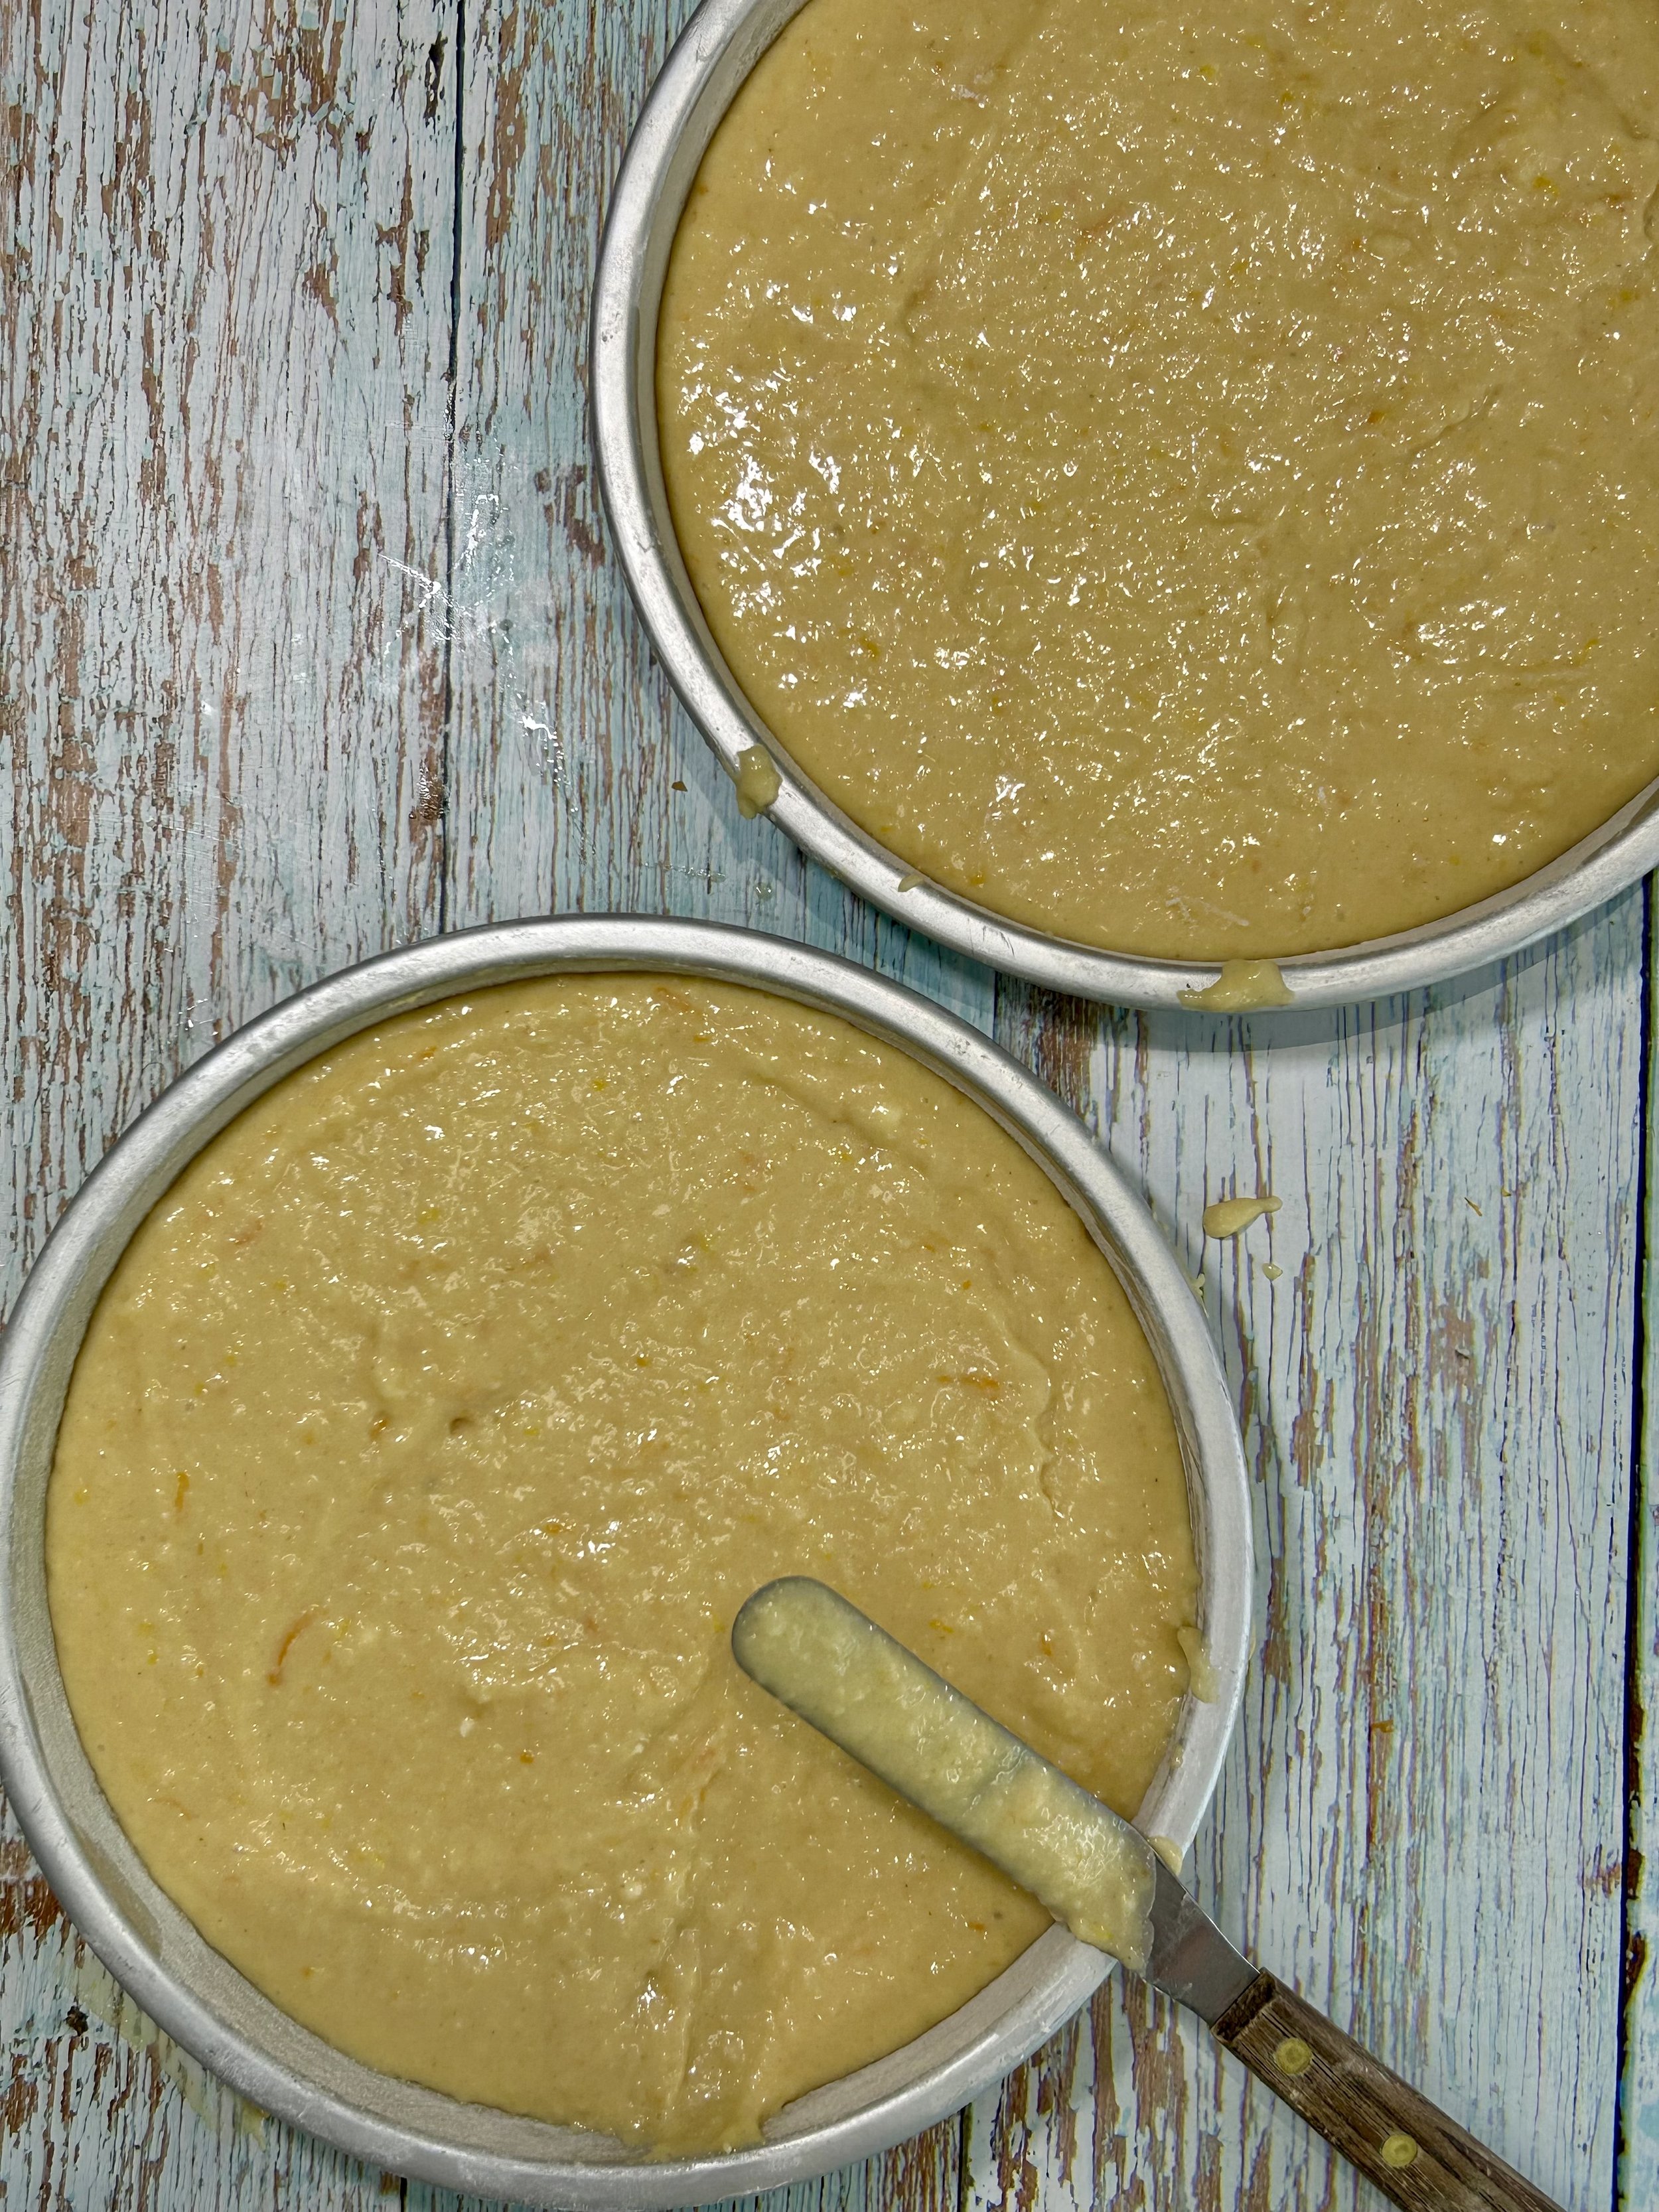
3/4 full cake tins and just level really gently
Place the softened butter and castor sugar into an electric mixer and let it run for at least 3 minutes until it becomes light in colour and lighter in texture.
Add the three eggs and scraping down the sides occasionally, let the mixer run until the batter is light and fluffy – at least 3 minutes, maybe longer
Keep the mixer running on low, and add the zest, vanilla and juice
Scrape the bowl down a few times to get everything mixed in.
Remove the bowl from the electric mixer, and using a wooden spoon or silicone spatula, fold in the flour and baking powder – Don’t over mix
Once just combined, divide the batter between the prepared cake tins, level then gently with an offset spatula and place into the hot oven to bake until a toothpick placed in the centre comes out clean – 20-25 mins – See Tip Box
Once baked, let the cakes sit in the cake tins for 10 minutes before running a palette knife around the edge of the tins and removing the cakes to a cooling rack to cool completely before decorating – See Tip Box

Smooth, but not too smooth
Icing
Place the soft butter in the bowl of an electric mixer and let it run on medium speed until the butter becomes light in colour and slightly fluffy. Scrape down the bowl several times.
Add the sifted icing sugar to the bowl along with zest, the vanilla extract and 2 tbsp of the juice – See Tip Box
Keep scraping down the bowl as you go and beat until the icing becomes very pale in colour and very light in texture.
If the icing isn’t spreadable texture, add more of the juice, 1 tsp at a time, beating well again between the additions.
Once ready, creamy and spreadable, cover with foil or cling film and set it aside, keeping at room temperature, until needed to decorate.

The cake looks lovely on a pretty cake stand
Flower Petals
Place the chocolate into a microwaveable bowl along with the coconut oil – See Tip Box
Heat at 30 second intervals, stirring in between, until most of the chocolate has melted.
Let the chocolate sit for further 30 seconds, and then give a final stir so the chocolate is smooth.
Before making the petals, let the chocolate cool for a couple of minutes.
Lay a few sheets of non-stick baking parchment onto a flat surface.
Place drops of chocolate onto the non-stick parchment – about the size of a grape – See Tip Box

Make lots of petals and choose the prettiest to use on the cake, any left over are perks of the cook.
Squeeze a little of each colour onto the corner of the parchment paper.
Use an offset spatula or back of a spoon, and swipe down the chocolate.
Dip the spatula into the food colouring and gently swipe down each petal.
Try to vary how much and how thickly the colour is in each of the petals.
Let the petals sit and set completely, while flat, before using on the cake – See Tip Box

As pretty as a flower
Assemble and Decorate the Cake
Add a little bit of the icing to the bottom of a cake plate and add one of the layers of the cake.
Divide the icing into two bowls.
Take one of the bowls and place some of it on top of the cake.
Smooth out to make an even layer.
Add some of the icing from the bowl to the top of the second cake
Repeat with the remaining layers finishing with the last cake.
Place half the icing from the last bowl on top of the cake.
Use an offset spatula to smooth the icing over the top and down the sides of the four-layer cake.
Stand the spatula up on end and run it around the cake making it as smooth as possible.
Add the remaining icing to the top of the cake and once again, smooth it down over the sides of the cake.
Use the spatula to make the icing smooth.
Gently peel the chocolate petals away from the non-stick parchment.
Place the chocolate petals on the cake to decorate, use your own pattern or up the side of the cake – as in the picture
If decorating as in the picture, start placing the petals around the outside of the top of the cake, leaving about 1/3rd of the petal protruding over the edge of the cake.
Lay the next layer of petals overlapping the first layer and carry one around the cake.
Repeat the petal layers until the top is completely covered and the top resembles a flower.
Serve the cake at room temperature but for long term storage, keep cool in the fridge

Eat the leftover chocolate
Tip Box
Baking Tins – I like to take the easy way out and use shallow cake tins when wanting to stack cakes, in this case, three 8” shallow cake tins. But if thicker cake tins are all you have, not a problem! Just divide the cake mixture between the two thicker tins and adjust the cooking time accordingly.
Baking- 1) All ovens vary so adjust baking tome accordingly
2) Baking time will also depend on how deep the cake tins are. Shallow will take less time to bake.
White Chocolate – 1) If no white chocolate chips available, grab a bar of white chocolate and chop it really small.
2) Melting – I use the microwave to melt my chocolate, but if that’s not something you’d like, use a saucepan of water. Let the water boil, place a heat proof bowl on the top of the saucepan (ensuring the bowl doesn’t touch the water) add the chocolate along with the coconut oil, and let it heat up slowly until the chocolate behind to melt. Giving it a mix every now and then so that its smooth.
3) Depending on how you want to decorate the cake, will dictate how big to make the petals. Experiment with a couple of sizes before going to town with them.
4) Petals – I like to make the chocolate petals the day before decorting the cake. Keep them cook at room temperature is possible.
Icing – 1) The recipe calls for 1-4 tbsp of juice. It might be that all of it gets used in the icing, but it may not. It may be that more is needed, but it may not. So, after adding the first two tablespoons and letting the machine beat, only add the rest in very small amounts until the end result is a lovely, creamy spreadable constancy.
Decorating – 1) For best decorating results, I like to let the cake cool for at least 5 hours, or rest overnight works great.
2) Placing petals – Place the petals in a pattern that sets them off the best. As well as the patter =n in the pictures, one idea is to place the petals in a double row down the cake. Having them in a random pattern all over the cake would also look pretty.
Stripes of colour make the petals stand out.

